


How To Do Everything Better
By Craig Ritchie
Lead photo credit – Scouts Canada Facebook
How To Build the Perfect Campfire
You can always rely on boy scouts when it comes to certain things, like doing good deeds, walking little old ladies across busy streets, and building awesome campfires. Julian Celms, former program director for Scouts Canada, insists that technique is the key to creating the ultimate marshmallow toaster.
To burn, a fire needs heat, fuel and oxygen. The trick, says Celms, is to build your fire in a way that encourages air flow. Build it flat on the ground and more often than not, your fire will choke out and die because air can’t get in.
Start by gathering all the stuff you need – tinder (small, highly flammable stuff like dried grass, leaves, bark and tiny sticks), kindling (small sticks the size of a pencil) and increasingly larger logs, from wiener-sized up to full-scale fire logs. Also grab a bucket of water so you can put the thing out.
“You take a two-foot stick that’s about the thickness of a broom handle, and drive it into the ground on a 45 degree angle,” explains Celms. “You place a grapefruit-sized ball of tinder under this stick about halfway along it, then lean your kindling against the stick over top of the tinder, like you’re building a lean-to.”
If there’s a bit of wind, Celms advises having the open end of the lean-to (the part that’s not stuck in the ground) facing into the breeze, to better aerate the fire. Just be careful that any airborne cinders won’t blow back onto anything flammable, like gas cans, wood piles or your shiny new RV.
Light the tinder with a match and the resulting fire should burn the kindling. As it burns, add progressively larger twigs, gradually moving up to full-sized logs.
“It’s important to ensure you have everything you need right there with you before you light the match,” cautions Celms. “If you run out of small sticks and have to run off to gather more, your fire will probably go out before you return. Or worse, it might go the other way and burn down the campground. You want to have everything you need right there beside you, right from the start.”
“At that point, you break out the marshmallows and enjoy.”
You can find a wealth of great outdoors tips at https://www.scouts.ca/ – After all, one has to be prepared.
How To Nail a Ringer
Pitching horseshoes is one of those things that isn’t as easy as it looks. Consistently nailing ringers takes a lot of practice, and just the right technique.
“The ideal is to pitch the shoe so it makes one complete revolution in the air, landing with the open end facing the peg,” says pitcher Lee Bond, of the Brantford (Ontario) Indoor Horseshoe Club. “It is important to bend your knees and take a step forward as you pitch, so you have your body momentum in sync. You want your arm and your leg coming forward together at the same time so your pitch is balanced and fluid. You want a nice, smooth follow-through.”
Also important is to avoid throwing across your body. If you throw with your right hand, you want to stand to the left of the peg, so your right arm is perfectly in line with the target. A right-handed thrower who stands to the right of the peg will have to pitch across their body, which makes it tough to attain consistent accuracy.
If you’re not having much luck, try to avoid the natural temptation to throw harder. “Over-throwing will hurt your accuracy,” warns Bond. “If things aren’t going well, then slow down.”
To see just how good some pitchers can become, check out the Canadian Horseshoe Championships in Abbottsford, B.C., from July 23 – 27, 2024, hosted by the Abbottsford Horseshoe Club.

How To Taste Wine
Canadian vintners produce some of the best wines in the world, so no surprise that wine tours have become extremely popular. Of course, the highlight comes at the end of the tour when you get to sample the merchandise. Like anything else, there’s a right way and a wrong way to taste wine, and it has nothing to do with the whole snob thing. You want to do it right, so you get the most out of the experience.

Maria Moessner, sommelier for Arterra Wines Canada, says it is important to start with the right glass. Dixie cups are out. “I highly recommend Riedel crystal, varietal stemware,” says Moessner. “Alternatively, a plain tulip-shaped, crystal glass, which has a thin narrow rim and wider base, will be sufficient.”
“When pouring, don’t fill the glass too full. One to two ounces is sufficient, otherwise swirling can get rather messy.”
Once you’re poured and ready to go, you hold the glass by the stem and tilt it slightly away from you, so you can get a good look at the wine, preferably against a white background. Wine should always be clear and bright. If it’s cloudy or hazy, something’s wrong.
“Wine colors will vary due to the grape variety used, the style in which it’s produced, the region in where it’s grown and the age of the wine,” explains Moessner. “White wines gain color with age, while red wines grow lighter. Generally, wines of lighter color (red or white) tend to be lighter in style, while those with deep intense colors are usually fuller-bodied.”
Swirl the wine around in the glass to aerate it and release its aromas (nature’s influence) and bouquet (winemakers influence). Notice how it clings to the sides of the glass and streams down – thick streams (called ‘legs’) usually indicate higher alcohol or sugar content, while thinner streams indicate a wine that’s light and dry.
Now it’s time for the sniff test. Swirl the wine again then put your nose right in there and take two long, deep sniffs. Your schnoz plays a huge role in the enjoyment of wine, says Moessner. “Just for fun, try sipping the same wine twice, first with your nose pinched shut, then again normally. The difference is truly unbelievable.”
Finally, you’re ready to taste.
“You have more than 3,000 taste buds, so be sure to use them all,” advises Moessner. “Flow the wine around evenly in your mouth, and take in a small amount of air to intensify your experience.”
Do you spit or swallow? If you are doing some serious sampling, then spitting is a necessity. Your senses will dull otherwise after tasting eight to 10 different wines (not to mention the fact you’ll be half in the bag). Different story though if you’re camped out under the awning, relaxing at the end of a wonderful summer’s day. Then, you relax, enjoy, and savor the gift of the grape.
For more information, please visit https://www.arterracanada.com/

How To Shuck Oysters
What could be more romantic than a bottle of wine and some fresh-shucked oysters on the half-shell? But shucking oysters isn’t as easy as it looks. You’ll need to practice your technique before you’ll be good enough to compete with the pros at the Prince Edward Island International Shellfish Festival, held each September on the Charlottetown waterfront. This year, the festival will be held in Charlottetown, Prince Edward Island, September 19-22, 2024.
“To really enjoy an oyster, it has to be well-shucked. This means that it is free from grit, and that it has been totally loosened from the cup, or the bottom half of the shell” says two-time Canadian champion shucker, John Bil. “Your job will be easier if you buy ‘choice’ or ‘fancy’ grade oysters. These indicate the shape of the shell, not its size. The shape should be more rounded and even.”
People have used everything from bottle openers to screwdrivers to open oysters, but nothing beats a good quality oyster knife. They generally feature a short, narrow, stiff blade, which may be slightly sharpened.
“Put a cloth down on a tabletop, lay the oyster on top and take a good look at it,” advises Bil. “You’ll see that one end seems to come to a point, and there is a bit of a gap there, between the shells. This is known as the hinge, or the back of the oyster. Insert the knife into the hinge and, holding the oyster firmly with your free hand, apply a steady twisting pressure with the knife, keeping the blade at a slightly downward angle. You should feel the knife working its’ way in slightly, and then the shells should pop.”
Now you just need to cut the oyster away from the shell. Scrape your knife along the inside of the shallower top shell first. The oyster will be attached at a point about two-thirds of the way to the front. Cut it loose and discard the top shell. The bottom shell, being deeper, is a little tougher to navigate. The oyster is attached to the bottom shell in the same place it was attached to the top, so turn it around and cut it loose. Clean out any little bits of grit or shell that you may have left in the oyster, and serve them up on crushed ice. Good job, chef! Let the eating begin!
For more information on the PEI International Shellfish Festival, please visit: https://peishellfish.com/

How To Hit a Hole-In-One
Although every golfer knows their chances of actually hitting a hole-in-one rank right down there with the odds of Tiger Woods showing up at their house to clean their clubs with his toothbrush, miracles do sometimes happen. Gary Bernard, who was a class A pro at the Fairmont Algonquin Resort Academy in St. Andrews, New Brunswick, national education advisor for the Canadian PGA, and recently retired as CEO of the PGA of Canada, says you’ll stack the odds in your favor by paying attention to technical details.
“For starters, be sure to use enough club, because being short on this shot just won’t cut the mustard,” explains Bernard. “Then, you align the clubface to your target. Align your body parallel to, and to the side of, the ball and your intended target line. Play the ball slightly forward of center in your stance, then let go of all your golf demons so you swing the club with the ease and grace of a Tai-Chi master.”
In other words, become one with the club so it feels like that hypothetical extension of your arms we always read about in golf magazines.
Having thus surrendered yourself to the magic of your sub-conscious and let fly, you should – in theory – then be able to retrieve your ball from the cup and enjoy your newfound 15 minutes of fame.
For more information on golf in Canada, please visit the Canadian PGA website: https://www.pgaofcanada.com/
Learn more about the game of golf – Eagles, Double Eagles, Condors, and Albatross, at this PGA website: https://www.pga.com/story/odds-of-a-hole-in-one-albatross-condor-and-golfs-unlikely-shots
How To Win at Ping Pong
Since marking its first appearance as an Olympic sport at the 1988 summer games in Seoul, Korea, table tennis, or ping pong, has soared in popularity world-wide. Mikael Andersson, former national coaching director for Table Tennis Canada, and as of June 2022, the Group Sports Director of the International Table Tennis Federation, says good technique is important, but it really pays to be sneaky.
Technique first – you make your life easier by playing from the correct position. Stand far enough back from the table that you can barely touch it with the end of the paddle when your arm is stretched out directly in front. You grip the paddle with either a penholder grip (holding the handle portion as you would hold a pen) or the much more popular shakehand grip, where you take the handle completely in your palm rather than between your fingers. Its like you’re shaking hands with the paddle.
“The shakehand grip allows you to hit the ball with either a forehand or a backhand stroke, so it is generally a better choice” says Andersson. “You bend your knees and make sure that all your moves finish with you holding the paddle in front of you. If you finish your shot and the paddle is still off to one side, your opponent will simply hit the ball back the opposite way. You can’t react quickly enough if you have to go all the way across your body, so it is very important to keep that paddle out in front at all times.”
Now for the sneaky part: To really put your opponent away fast, learn to spin the ball by imparting a slicing motion when you hit it. Spinning the ball will cause it to take wild, completely unpredictable bounces off the table surface, which can be almost impossible for your opponent to respond to.
“Spinning the ball is a difficult skill to learn,” says Andersson. “But once you become proficient, no one will beat you. At least, no one who isn’t already on the national team.”
Learn more at the Table Tennis Canada website: https://ttcanada.ca/
Check out the International Table Tennis Federation here:
https://www.ittf.com/
How To Dance Like Fred and Ginger
You and your other half want to dance like Fred and Ginger, but you’re afraid of looking more like Fred and Barney. No worries, says Bill Jacobsen, a former Canadian champion ballroom dancer and director of the Dance Tonight studios in Edmonton, and former franchisee of Arthur Murray Edmonton and Calgary in Canada and Coral Gables in Florida. Any couple can dance like pros once the man learns to treat his lady like a grocery cart.
“It sounds silly, but it really is a good analogy,” laughs Jacobsen. “The man needs to stand up straight and give the lady something to dance with, by holding his elbows out strong and firm. You know, like you push a grocery cart. You don’t push a grocery cart around with your gut, so you shouldn’t dance that way either.”
At the same time, the lady should resist the natural temptation to dance on her toes, taking little, short steps. Because women are generally not as tall as their partner, they often automatically shift up on their toes to dance. But that makes them take much shorter steps than normal, and results in them getting stepped on. The ballroom rule is that the foot on the bottom is the one at fault.
The key to dancing, Jacobsen insists, is to forget about modern political correctness and for men to lead, and women to follow.
“The man needs to decide where he’s going to go on the dance floor, and then he needs to go there with some sort of authority. The lady, in turn, follows his lead. Couples get tangled up when the communication breaks down. The man isn’t definitive, or he tries to direct his partner to go one way instead of inviting to do so. He wants her to go this way, she isn’t sure what he wants her to do, and someone winds up on doing a face plant.”
Don’t buy into the age-old clap-trap about some people having no rhythm at all. Everyone can dance, but some may have trouble keeping time to the music. Listening to the bass line helps.
“Finally, don’t ever be afraid to be the first ones on the dance floor,” says Jacobsen. “Forget about everyone else and just have fun. The fact is, even if you mess up a little, people have no idea and no one knows anyway. We do this for fun, so just let go and enjoy.”

How To Barbecue The Perfect Steak
What is summer without barbequing a couple of steaks? Nothing celebrates the sunny season like a tender T-bone or a succulent sirloin sizzling away on the grill. Great steak dinners begin with great steaks, says Pamela Singh, assistant manager of corporate affairs for Kraft Canada, makers of Bullseye BBQ Sauce. Don’t scrimp on meat – if you’re going to do this right, you start with a top-quality sirloin or T-bone, with plenty of marbling. To reduce flare-ups, trim the fat to about one-quarter inch thick, and slash the edges at one-inch intervals.
“It’s always a good idea to let beef sit at room temperature for 20 to 30 minutes (no longer though) before grilling it. This standing time gives you a more tender steak,” advises Singh. “Then pre-heat the grill. This is really important, because a hot grill will immediately sear in the juices, so your steak doesn’t dry out.”
As soon as the meat hits the grill, turn the barbeque down to medium heat. For a one-inch thick steak, allow four minutes on each side for rare, five minutes for medium and six minutes for well done.
You turn the steaks when the bottom appears well browned. Always use tongs for this delicate task. Piercing a steak with a fork allows the juices to run out, leaving your prized dinner tasting like a mouthful of sawdust.
“A steak that is rare will feel soft and juicy to the touch,” says Singh. “Medium is firmer, but still spongy to the touch. Well-done is firm throughout.”
Tender steaks like premium sirloins and T-bones don’t require marinating prior to cooking, but that’s a matter of personal taste. For great tips on preparing steaks (or virtually any other type of food) visit Kraft Canada’s extensive (and fabulous) website, at www.kraftcanada.com Search for Barbecue Steak to go to this array of recipes: https://www.kraftcanada.ca/search?searchTerm=barbecue%20steak&filter=cookingmethod:bbq
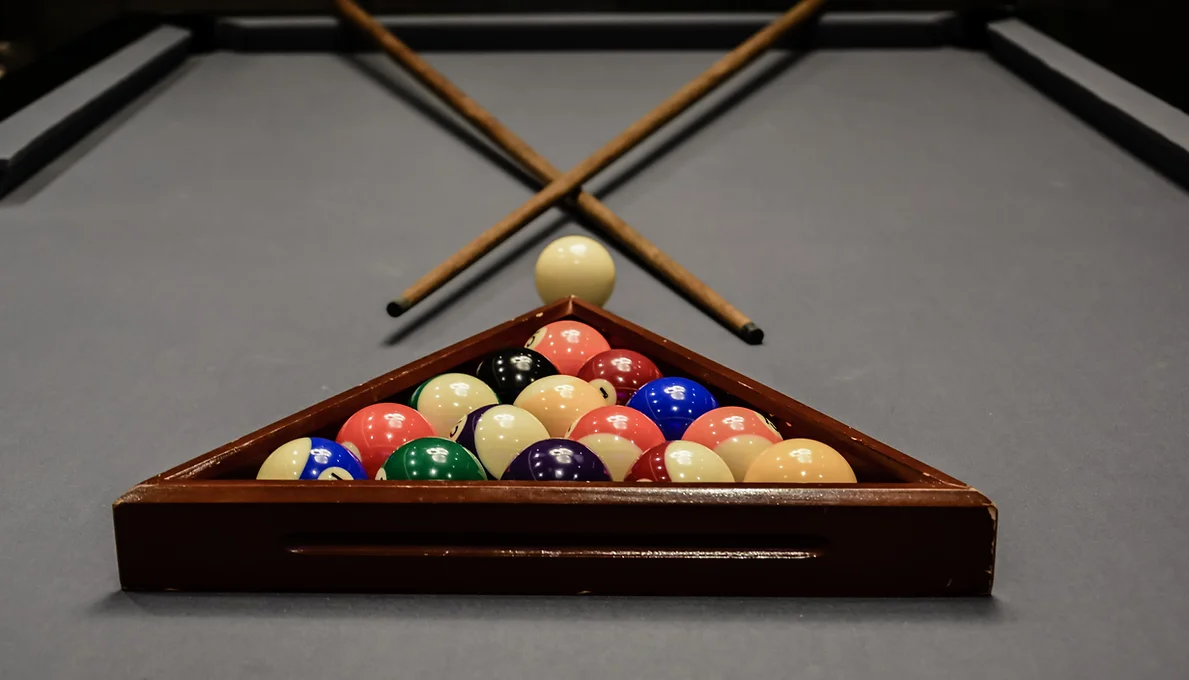
How To Shoot Pool Like Minnesota Fats
Pool has its roots in French croquet. Played on a lawn, a ball (or bille, hence the name billiards) would be hit around at other balls. Downsized and moved indoors so it could be enjoyed year-round, the French kept the connection to the lawn by playing it on green felt.
The pool most of us play today is a game called eight-ball. There are actually 15 balls – seven solid colored, seven striped, and the eight ball itself which is solid black. You sink all the balls of your type (stripes or solids) then pot the eight ball before your opponent does and you win.
The only real way to become really good at pool is to practice – lots. But there are a few things you can do to accelerate that learning curve.
“The biggest problem most people have is that they just don’t relax when they shoot,” says former Canadian billiards champion, Mike Jarvis. “Many people tense up as they take aim, they hold their breath, and they make it terribly hard for themselves to hit the ball straight.” Jarvis suggests taking a couple of slow, deep breaths as you aim the ball, then exhaling completely right before you shoot. “The body is most stable at that point,” he explains, “so you’ll generally get a much more accurate shot.”
The way the cue ball strikes the ball you’re trying to sink will affect its direction. Hit it straight on, and the ball rolls straight forward. Hit it on one side or the other, and the ball will deflect in the opposite direction. “You don’t need to hit the ball very hard,” says Jarvis. “To develop a feel for it, you’re better off to hit the ball less aggressively, so you can see how it reacts. That will give you a good guide for future shots.”
How your cue stick strikes the cue ball will also affect your shot. Hitting it straight on will provide a straight-line shot. Hitting the cue ball towards the bottom will cause it to back-spin, which will normally make it stop rolling after it strikes another ball. This can save it from rolling into a pocket itself, or wandering down the table, leaving you in a poor position to take a follow-up shot.
Conversely, hitting the cue ball near the top will make it roll farther, a great tactic when you don’t actually expect to sink a ball, but simply wish to move the cue ball to the other end of the table to inconvenience your opponent. Hitting the ball on the sides will also impart a spin, sending the ball arcing in the opposite direction.
For more information on the game, please visit the Canadian Billiards and Snooker Association at https://www.cbsa.ca/
For links to international Billiards associations, please visit:
https://www.cbsa.ca/associations
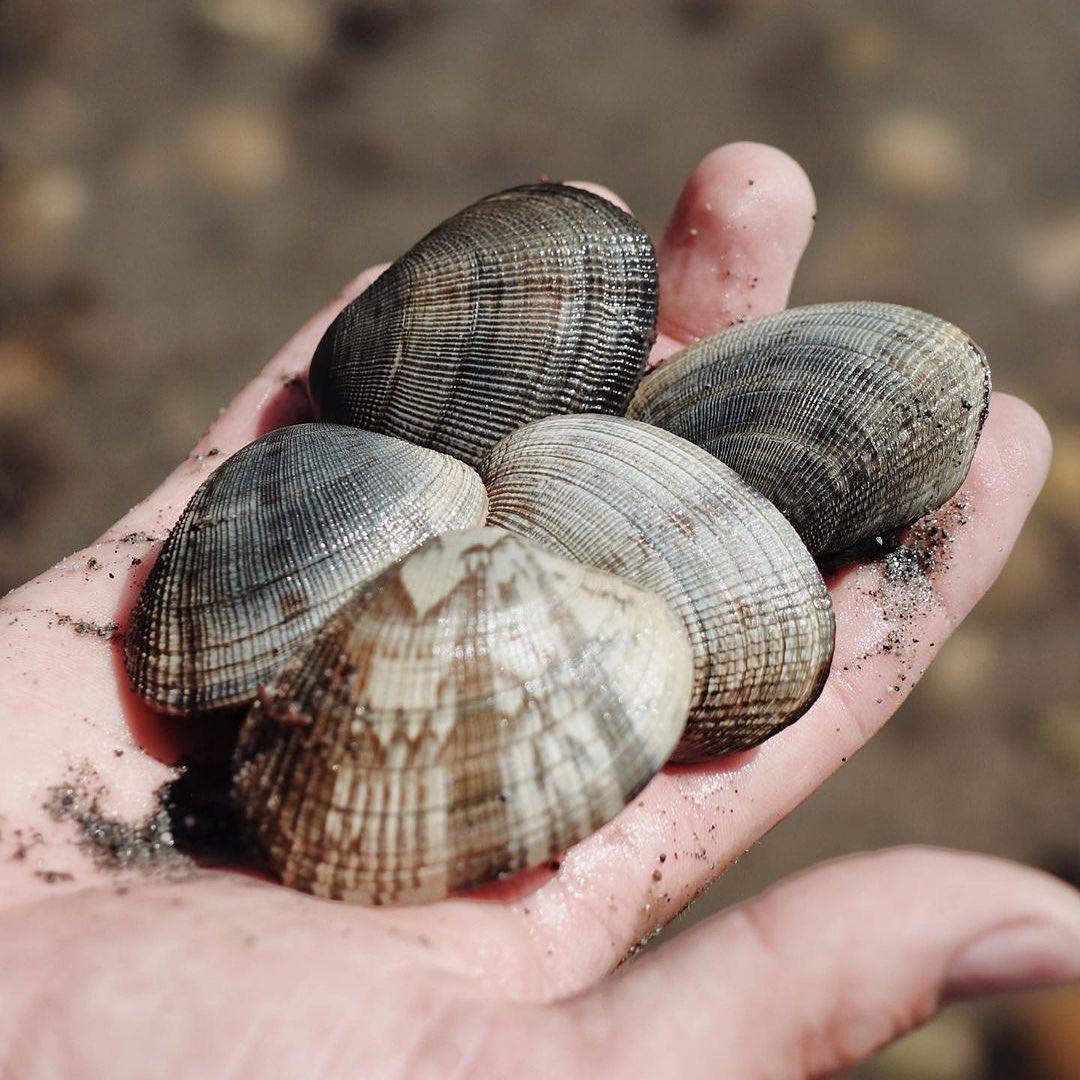
How To Dig Clams
There’s nothing like freshly-steamed clams to highlight any seaside holiday. Even better is when you dig the clams yourself. Stephen Wong, a food and beverage consultant and cook book author based in Vancouver, says gathering the little beasties is almost as much fun as eating them.
“You find clams at low tide, in the inter-tidal zone on sandy beaches,” offers Wong. “As you walk along among the tide pools, you’ll see little holes in the sand, which reveal were a clam has withdrawn it’s neck or started to dig. Generally, a larger hole indicates a larger clam, but not always.”
“Clams might bury from six inches to maybe a foot deep in the sand, so you can use a shovel or even just your hands to dig them out,” advises Wong. “Generally, places which are covered by an inch or two of water are better than dry sand, because the clams there will be much closer to the surface. It’s also easier to dig in the wet spots if you’re gathering them by hand.”
Clams are subject to open seasons and possession limits, so be sure to check the regulations before you begin scooping them up. Most marinas or fishing stores should be able to give you the latest, or you can check in with the Department of Fisheries and Oceans web site (https://www.dfo-mpo.gc.ca/index-eng.html ). That’s also a good way to check for Red Tide advisories as well (a natural phenomenon, red tides are times when you want to avoid shellfish entirely).
Once you’ve dug up enough clams for a feed, Wong advises letting them soak in a pail full of sea water for an hour or two, to free them of remnant sand or debris. “Then, you eat them and enjoy.”
Eat your way through some of Stephen Wong’s best recipes – find his books here: https://www.eatyourbooks.com/authors/10597/stephen-wong

How To Win In Monopoly
Every RV needs a Monopoly board. And since it’s only a matter of time till you face a rainy day or an evening meant for relaxation, you’d best hone your skills to keep from going bankrupt once the games begin.
Canadian Monopoly champion, Dana Bryant, follows a simple strategy to keep ahead of the other players. “On average, people need five turns to make it around the board,” says Bryant. “So if you look at the board with that in mind, you can begin to predict which spaces people will land on most frequently. Illinois Avenue is the square most often landed on, followed by the B&O Railroad and Go.”
“The orange properties are also great because of their relationship to Jail. Everyone winds up in Jail eventually. Because six, seven or eight are the most common results when you roll two die, players often come out of Jail, roll a six or an eight, and wind up directly on the orange properties. They’re good ones to put hotels on.”
Bryant advises trying to acquire all the properties within a color group so you have a monopoly, even if that means trading with other players. “Then put up three houses on each property as quickly as possible. The rent increases substantially between two houses and three houses. On Illinois Avenue, for instance, it jumps from $300 to $750.”
The exception comes when you’re stuck with nothing but low-income properties. Then, Bryant advises building four houses on each property, simply to tie up the number of buildings available for other players. 20 of the 32 houses in a standard Monopoly game could be tied up on just five properties.
“Finally, if you can only afford to build houses on one of the properties within a color group, put them on the last one. It costs the same, but the rent collected is higher.”
Follow that advice and you’ll be a much more successful Monopoly player!
Check out Monopoly at the Hasbro website:
https://shop.hasbro.com/en-us/product/monopoly-classic-game/7EABAF97-5056-9047-F577-8F4663C79E75


